| Mark E. Gunnison | www.MGCPA.com |
|
Step 1: The first step is to decide the overall size of your wing. This includes what kind of ailerons you will be using, if any, how large the wing will be, if it has dihedral, how think it will be... Spend some time in this step as once you get started you will not be able to change much. Once you have the overall size of the wing selected, you will need to select the shape of your airfoil. Airfoil shapes can be found online as well as in books. Once I find the shape that I plan on using, I adjust the size of the image I'm using (usually with a copier although this can easily be done with photo editing software and a printer) so it approximates what I will need for my wing. Once I have a pattern I'm happy with, I'm ready to I get started.
Step 2: Using my airfoil pattern, I lay it on a sheet of balsa and cut around it with a hobby knife. I don't try to be exact but I have found being fairly exact speeds up the next step. This step is repeated over and over until the correct number of ribs have been cut out. Once I have all of my ribs cut out, I pile them up and hold them together with a spring clamp. I then drill two holes through the ribs so I can insert two dowels to hold the ribs together - this prevents them from moving. I then sand down all of the edges with a sanding block to make a pile of identical ribs. The following picture shows a set of nicely sanded ribs.

Step 3: I like to use two pieces of spruce separated with webbing to build my spar. At this point a notch will need to be cut into the top and bottom of the ribs for the spruce spar. Be sure to cut the notch a bit tight so the rib will stand on the spruce spar while gluing. You will also want to cut a 90 degree notch into the front of the block of ribs to later glue in a square stick of balsa that can be sanded into the leading edge.
Step 4: First glue the ribs onto the bottom portion of the spar being careful everything is straight and true. Be sure to press/hold everything down on your building board to avoid warping the wing. For this reason I prefer a small square and CA to a jig and white glue. If anything moves during this process you will have a twist that you will need to try and get out while applying your covering. Once the lower piece of spruce is installed, glue in the upper piece once again checking that everything is true. Finally, glue in the leading edge square stick of balsa and the trailing edge stick - not shown in the photo.
Step 5: Next install the webbing being sure the grain runs up and down. I usually install webbing on both sides of the spar near the center, on one side as I get further out on the wing, and sometimes none out on the ends. It all depends on the stresses placed on your wing.
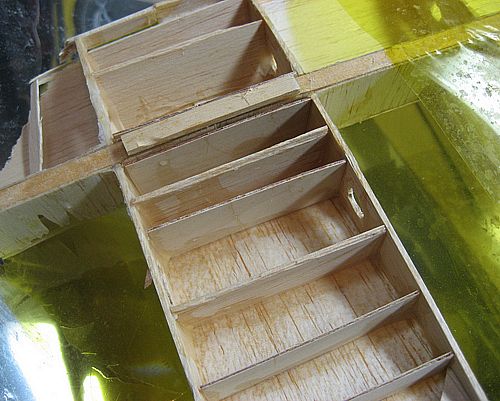
Step 5: I prefer balsa sheathing on my leading edge. (Other modelers will run three or four sticks parallel to the leading edge in place of sheathing.) I like the look and the strength sheathing adds without much of a weight penalty. To install it I start at the leading edge, tack glue the sheathing to the square stick I earlier glued into the notch at the front of the ribs. I then stretch the sheathing over the ribs and glue it in place with CA. Once the glue is good and dry, I sand everything down.
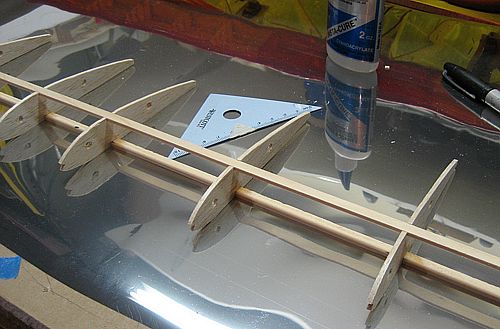
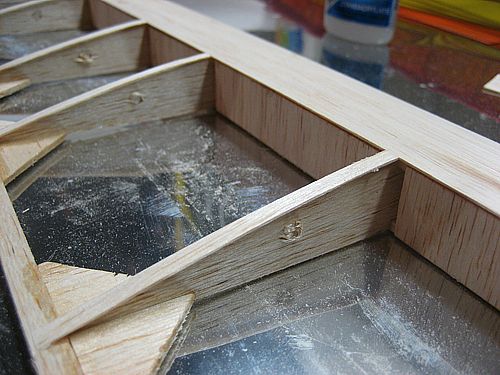
Step 6: I usually install reinforcing triangles along the trailing edge for added strength. I don't usually install as many as are seen in the following photo but due to the thin size of my trailing edge, I was worried about my aileron hinges splitting the trailing piece of balsa. Half as many as are shown in the photo would usually be all that is needed. They can also be smaller than what is shown. The goal is to keep the ribs from separating from the trailing edge stick and maybe reduce some of the flex.

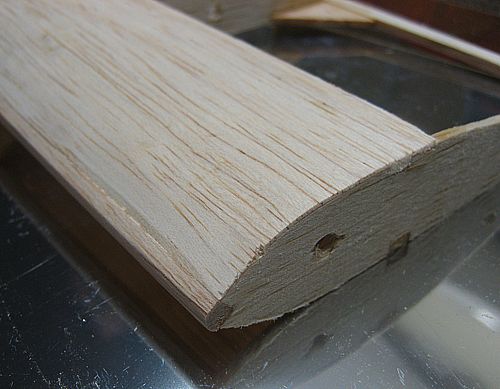
Step 7: This step is purely cosmetic. I like to run a thin strip of balsa along the top edge of my ribs from the trailing edge of the sheathing to the trailing edge of the wing. This gives a smooth transaction along the top of the wing. It probably adds some strength but as I said it is really just cosmetic.
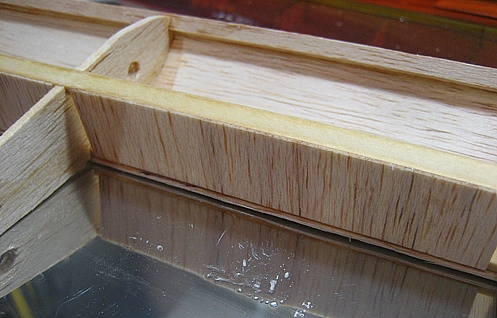
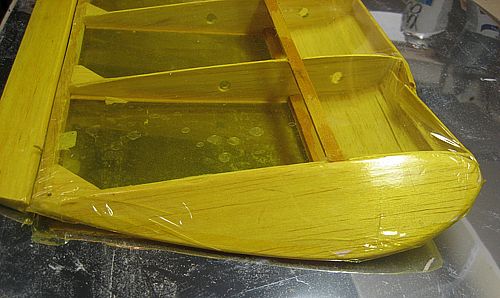
Step X: I'm actually building a canard with zero dihedral in the above photos. With most applications some dihedral will need to be added to the wing - typically three to four percent for a wing with ailerons and at least six percent for a plane without ailerons. This prevents the use of a through spar and adds a weak point in the center of the wing. Using the following method I have never had a wing break in half where the two halves join: I build the wing in two halves extending the center spruce spar sticks one to two inches past the center rib on each wing. I'm also careful to cut the top spruce sticks slightly shorter to achieve the angle of dihedral I'm looking for. I then cut a piece of ply that can be placed between the upper and lower spruce sticks that also butts up against each of the center ribs. It is kind of tricky to get the correct dihedral cut into the ply and have it fit tightly into the slot in the middle of the spar. I then fill the slot with epoxy, insert the ply, and install webbing to seal everything together. I will use heavier webbing here than on other parts of the wing. I then install a number of cross pieces that connect the two center ribs gluing everything with epoxy. The following picture shows the underside of the center section of an old wing that was cut in two during a midair crash. I usually add sheathing across the full center section of the wing (as seen in the photo) to add strength. I will also sometimes add additional bracing from the first to the second rib (not in the photo) to spread out the load. The key is to make the area where the two halves join as strong as possible without adding too much weight.
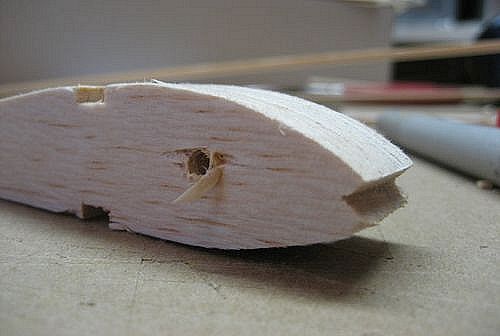
Wing Tips: I didn't mention wing tips earlier because the wing I was building will have winglets which I will add after covering the wing. However, on most wings some type of wing tip should be added. Following are some photos of my favorite wing tip design. (These pictures were also taken from my wing that was cut in two during a midair crash.) Start by extending the top spruce spar an inch or so past the outer rib while ending the lower spar at the outer rib. Extend the leading edge square stick and sheathing past the outer rib and plan on trimming them once you have the tip in place. Then carefully cut a sheet of balsa to the shape needed to cap the end of your wing as shown in the second photo. Then start cutting and sanding everything until you have what looks like a nice wing tip. Glue it together and you will be surprised how nice it looks once it is covered.

|